
Remove a Face Mask In the Modern digital era, photo editing apps have become essential for refining images and expressing creativity. PicsArt stands out as a powerful tool, offering various features, including the seamless removal of unwanted elements from photos. In this guide, we’ll provide a step-by-step walkthrough on how to remove a face mask in PicsArt, helping you achieve flawless edits effortlessly.
PicsArt has revolutionized the way we edit photos. Whether you are looking to enhance your selfies, create captivating portraits, or remove distractions from your pictures, PicsArt is an incredibly versatile tool. One common editing task that many users face is how to easily remove a face mask from an image. In this comprehensive guide, we will walk you through the process of effectively removing a face mask in PicsArt, giving you a polished and seamless final image.
What is PicsArt?
PicsArt is a powerful photo editing app available for both Android and iOS devices. It offers a wide range of features, from basic adjustments to advanced editing tools such as AI-powered effects, photo collage creation, and even background removal. With its intuitive interface and creative tools, PicsArt allows users to enhance their photos effortlessly, making it a popular choice for photographers and content creators.
Downloading and Installing PicsArt
If you haven’t done so yet, download and install PicsArt from your device’s app store. To complete the installation successfully, follow the appropriate steps based on your device type.
Opening PicsArt and Importing a Photo
Open the PicsArt app from your device’s home screen. Upon launching, you’ll be presented with various options. Tap on “Edit” to begin editing a photo. Next, choose the image you wish to edit from your gallery or use the camera option to take a new one.
Basic Editing Tools
- Adjust: Tap this tool to fine-tune brightness, contrast, saturation, and other settings.
- Effects: Discover a variety of artistic effects by tapping on this option.
- Crop: Use the Crop tool to resize or trim your photo to the desired dimensions.
- Tools: This section provides additional editing features, such as clone, stretch, curves, and more.
Adding Effects and Filters:
Tap on the “Effects” tool to explore a variety of filters and effects for your photo. Browse through the available options and choose the one that suits your style. Use the slider to adjust the intensity of the effect to your preference.
Adding Text and Stickers:
Tap on the “Text” tool to add personalized text to your photo. You can customize the font, color, and size to match your desired look.
Next, use the “Stickers” tool to enhance your photo with fun and creative stickers. PicsArt offers a wide selection of stickers across various categories.
Applying Masks and Brushes:
- Mask: This tool lets you apply effects selectively to specific areas of the photo, allowing for more precise edits.
- Brush: Use the Brush tool to manually draw or erase parts of the photo, giving you complete control over your edits.
Final Touches and Adjustments:
Once you’re happy with your edits, make any final adjustments using the available tools. Feel free to experiment with different settings until you achieve the perfect result.
Saving and Sharing Your Edited Photo:
Once you’re finished editing, tap the “Save” button to store your edited photo on your device. If you’d like to share your creation, tap the “Share” button to post it directly to social media platforms like Instagram, Facebook, and more.
Remove a Face Mask
Step 1: Open the Photo
Launch the PicsArt app on your device and open the photo containing the face mask you wish to remove. You can either select an existing image from your gallery or take a new one using the app’s camera feature.
Step 2: Select the Eraser Tool
Once your photo is open, tap on the “Tools” icon at the bottom of the screen. Scroll through the available tools and select the “Eraser” tool, represented by an icon that looks like a pencil eraser.
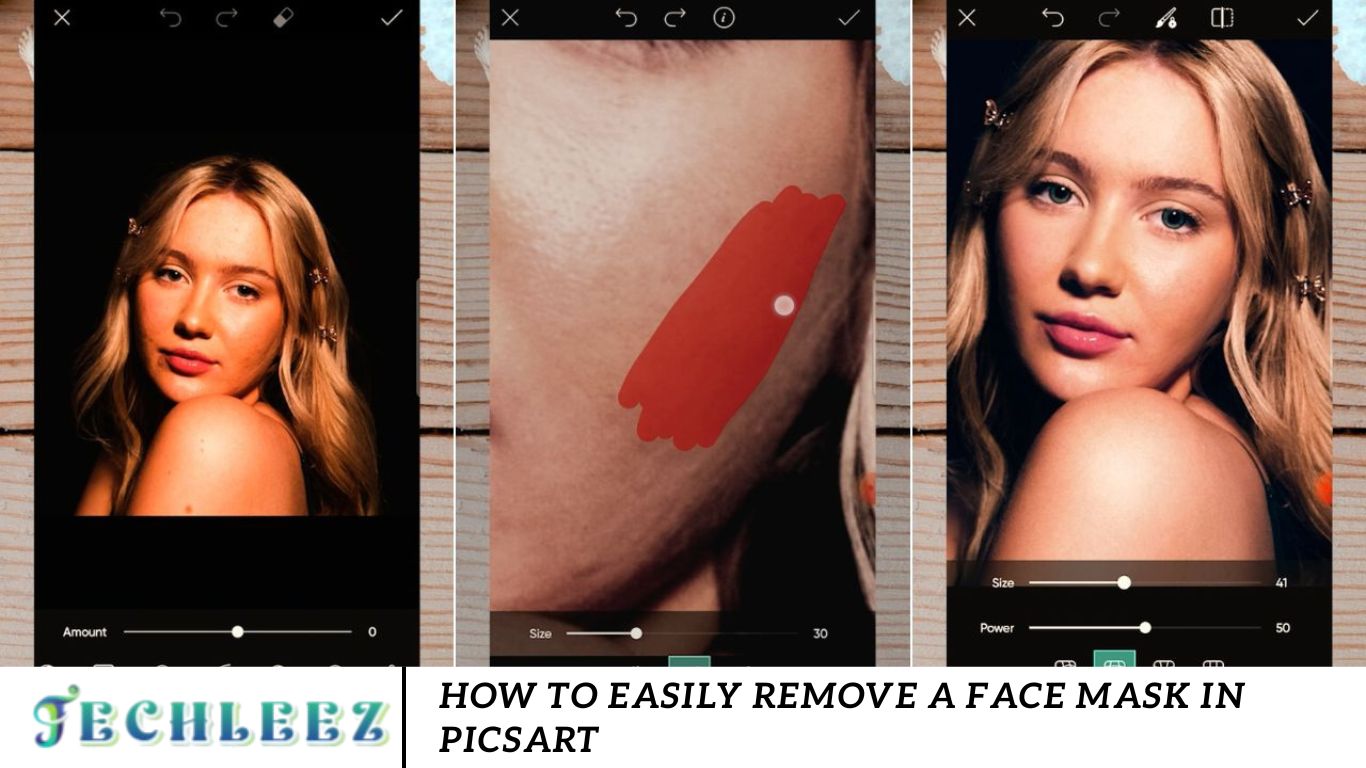
Step 3: Adjust Eraser Settings
Before you start erasing, adjust the eraser settings to match your needs. Tap the eraser icon to modify the size and hardness of the eraser. Use a larger size for broad areas and a smaller size for more precise erasing.
Step 4: Erase the Face Mask
With the eraser tool active and the settings adjusted, carefully begin erasing the face mask from the photo. Use your finger or a stylus to remove the mask, making sure to only erase the areas you want to eliminate. Zoom in if necessary for more accuracy.
Step 5: Refine Edges (Optional)
After removing the mask, you might notice some rough edges or remnants. To smooth these out, use a smaller eraser size or adjust the hardness setting. This step is optional but helps in achieving a cleaner and more polished look.
Step 6: Save Your Changes
Once you’re happy with the result, tap the “Apply” or “Save” button to finalize your edits. You can then save the photo to your device or directly share it on social media to show off your editing skills.
Frequently Asked Questions
What is the Cutout Tool in PicsArt, and how does it help with removing a face mask?
The Cutout Tool in PicsArt isolates specific areas of your image. When removing a face mask, you use this tool to outline the mask, preparing it for further editing. Once you’ve selected the mask, you can proceed to remove it using the Clone and Healing tools.
Can I remove a face mask without making the skin look unnatural?
Yes, you can achieve a natural look when removing a face mask by using PicsArt’s Healing Tool to blend the edited area with the rest of the skin. When using the Clone Tool, make sure to choose a skin tone similar to the surrounding area, and apply the Healing Tool along the edges to soften any harsh lines.
Can I undo mistakes while removing a face mask in PicsArt?
Absolutely! PicsArt has an Undo button that allows you to reverse any mistakes you make during the editing process. Tap the Undo button if you make an error and try again.
Can I remove a face mask in PicsArt if it’s part of a complex background?
Yes! PicsArt’s Clone Tool allows you to sample areas of the image to replicate textures and colors, which is especially useful when removing a mask in a complex background. Just be sure to carefully select regions that match the background to keep it looking natural.
Conclusion
Removing a face mask in PicsArt is straightforward and can be achieved with just a few tools and techniques. By following the steps outlined in this guide, you can effortlessly remove a face mask and enhance your photos, giving them a clean, polished, and professional look. With the combination of PicsArt’s Cutout, Clone, Healing, and Brush tools, you have everything you need to perfect your images and share them with the world. Happy editing!