
The DSLR blur effect has revolutionized photography by delivering a stunning bokeh that enhances subject-background separation, giving images a professional touch. With the advancement of apps and software replicating this effect, achieving DSLR-quality blur is now easier than ever even without a high-end camera. In this article, we’ll explore what the DSLR blur effect is, how to apply it to any photo, its key features, advantages, drawbacks, and the best alternatives.
DSLR blur effect in photos can dramatically enhance their visual appeal by drawing attention to the subject while softening the background. Whether you are using a professional camera, a smartphone, or post-processing software, achieving this effect is easier than you might think. This guide explores multiple methods to create the sought-after blur effect, also known as bokeh, to make your photos look professional.
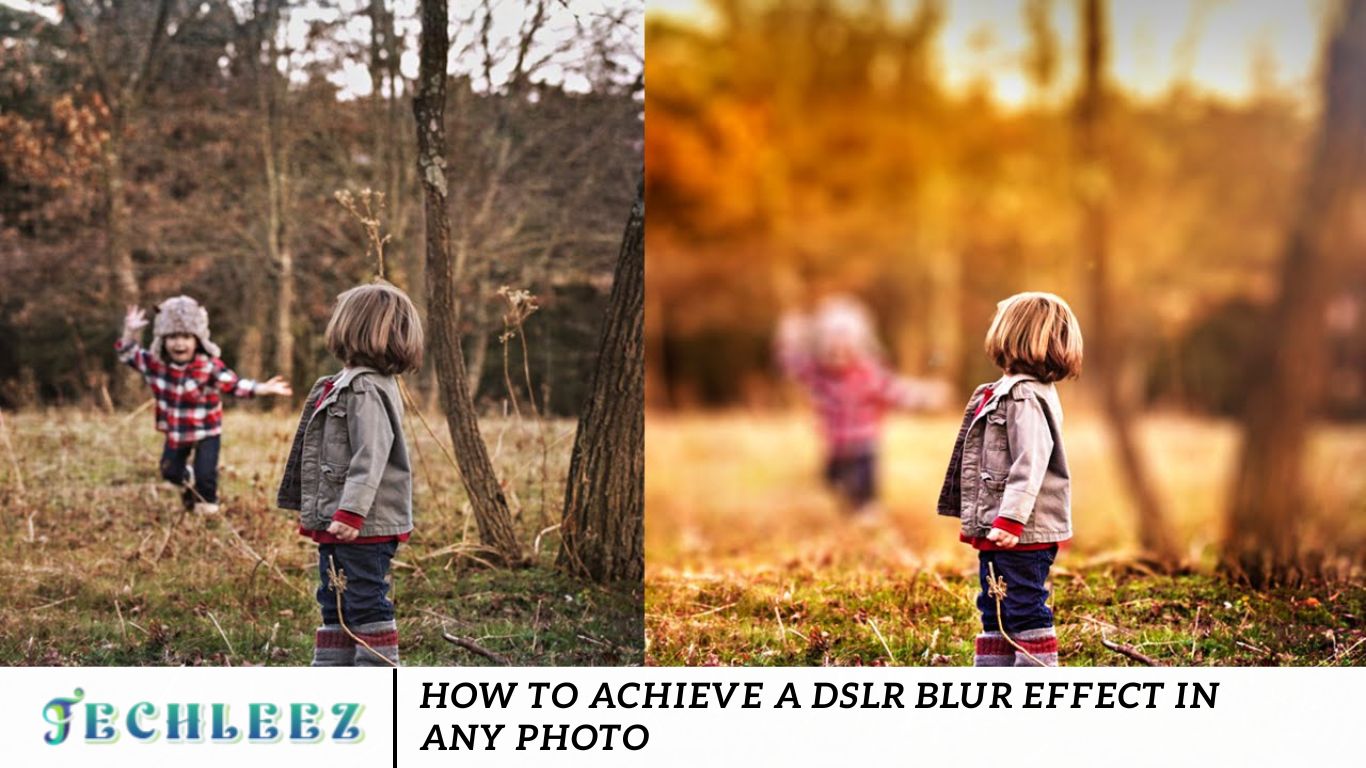
What is DSLR Blur Effect in Any Photo?
The DSLR blur effect emulates the shallow depth of field traditionally produced by DSLR cameras, ensuring the subject remains sharply in focus while the background fades into a smooth blur. This technique enhances depth and visual appeal, making photos more dynamic and professional. Thanks to advanced apps and editing tools, this sought-after effect can now be applied to images captured on any device, including smartphones.
How DSLR Blur Effect in Any Photo
Applying the DSLR blur effect can be done using various methods, depending on the app or tool you choose. Here’s a step-by-step guide to achieving a professional-looking blur:
- Capture a High-Quality Photo – Start with a well-lit, sharp image for the best results.
- Select an Editing App – Use apps like PicsArt, Snapseed, or Adobe Lightroom that offer blur effects.
- Locate the Blur Tool – Find the blur or depth-of-field adjustment feature within the app.
- Identify the Subject – Manually or automatically highlight the subject to keep it in sharp focus.
- Apply the Blur Effect – Adjust the blur intensity and style (e.g., Gaussian, lens, or radial blur).
- Refine the Edges – Smooth the transition between the subject and the background for a natural look.
Features of DSLR Blur Effect in Any Photo
Background Customization
- Adjustable blur intensity and radius for a tailored effect.
- Multiple blur styles, including Gaussian, radial, and motion blur, to achieve different artistic looks.
Subject Selection
- AI-powered subject recognition for precise separation.
- Manual selection tools for greater control over complex subjects.
Edge Refinement
- Smooth transitions between the subject and background for a natural depth-of-field effect.
- Advanced tools for masking and feathering to fine-tune edges.
Enhancements
- Built-in filters and effects to complement the blur for a polished look.
- Options to change background colors or textures, enhancing creative flexibility.
Ease of Use
- User-friendly interfaces that simplify the editing process.
- Access to tutorials and ready-made templates for beginners to achieve professional results effortlessly.
Pros of DSLR Blur Effect in Any Photo
| Pros | Description |
|---|---|
| Cost-Effective | Achieve DSLR-like results without buying expensive equipment. |
| Accessibility | Available on most smartphones and editing platforms. |
| Customization | Adjustable settings to match your aesthetic preferences. |
| Enhances Visual Appeal | Creates professional-quality images easily. |
| Suitable for All Skill Levels | User-friendly interfaces cater to beginners and pros alike. |
Cons of DSLR Blur Effect in Any Photo
| Cons | Description |
| Limited Realism | Overuse can make images look artificial. |
| App Dependency | Requires specific apps or software. |
| Learning Curve | Some tools may require time to master. |
| Quality Loss | Excessive editing may degrade image quality. |
| Compatibility Issues | Some features may not work on older devices. |
DSLR Blur Effect in Any Photo Alternatives
| Alternative | Features |
| Snapseed | Free app with precise editing tools and blur effects. |
| PicsArt | Creative editing features including customizable blur options. |
| Adobe Lightroom | Professional-grade editing with advanced blur controls. |
| FaceTune | Easy-to-use interface for portrait-focused blur effects. |
| AfterFocus | Specialized in creating DSLR-like background blur effects. |
Frequently Asked Questions
What type of background works best for a DSLR blur effect?
A clutter-free background with some depth works best. Textured backgrounds like trees, lights, or cityscapes create a beautiful bokeh effect when blurred.
Can I create a blur effect in videos?
Yes! Apps like CapCut, Kinemaster, and Adobe Premiere Pro allow you to apply background blur to videos, simulating the DSLR effect.
Can I blur only part of an image?
Yes! In editing apps like Photoshop, Snapseed, and Lightroom, you can use selective blur tools to blur specific areas while keeping the subject sharp.
Can I remove background blur after applying it?
If you used an editing app, check if the app has an “undo” or “history” option. If you used portrait mode on a phone, some devices allow adjusting the blur after capturing the photo.
Are there AI-powered tools that can blur the background automatically?
Yes! AI tools like Remove.bg, Luminar Neo, and Canva AI can detect subjects and blur backgrounds with one click.
Conclusion
Achieving a DSLR blur effect in any photo is possible, regardless of your equipment. By mastering camera settings, utilizing smartphone portrait modes, or applying blur in post-processing, you can create professional-quality images effortlessly. Whether you are a photography enthusiast or a social media content creator, these techniques will help elevate your visual storytelling.